Jeff Tian 定律: 一切可以通过网页版实现的应用,最终都将通过网页版应用发布。
开个玩笑,以上 Jeff Tian 定律其实是 Jeff Atwood 定律的一个推论。Jeff Atwood 定律说,一切可以用 JavaScript 编写的应用,最终都将会通过 JavaScript 来编写。于是很容易推出 Jeff Tian 定律,网页应用终将统治世界。
设备码授权许可,是开放授权 OAuth 2.0 的许可类型之一,之前在《<font style=color:rgb(18, 18, 18);>OAuth 2.0:对接 Keycloak 设备码授权流程 - Jeff Tian的文章 - 知乎 》以 Keycloak 作为认证服务,详解了如何对接设备码授权许可。紧接着,又在《<font style=color:rgb(18, 18, 18);>OAuth 2.0:对接 IdentityServer 设备码授权流程 - Jeff Tian的文章 - 知乎 》中以 Duende IdentityServer 为例,再次使用 k8ss 命令行工具对接了设备码许可授权登录流程。
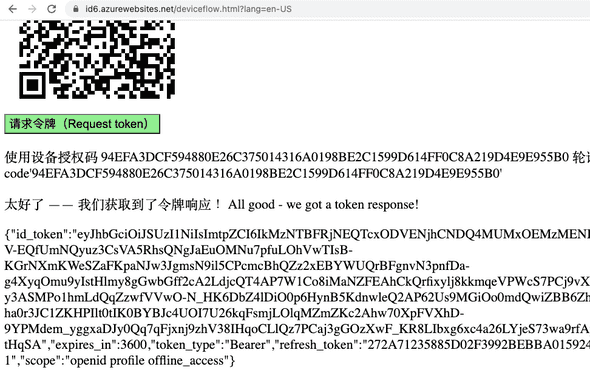
尽管使用命令行工具对接设备码许可流程是非常适合并且有着广泛的实际应用,但毕竟需要用户安装一下,才能体验。出于教学和体验需要,今天再次做一个网页版本的设备码授权许可登录流程,直接访问 https://id6.azurewebsites.net/deviceflow.html 即可体验!
相关代码提交
基于之前部署的 IdentityServer,增加了一个设备码流程的网页客户端。全部代码改动在一个提交内完成: https://github.com/Jeff-Tian/IdentityServer/commit/c6f28382036ce3723fa0c6e155b6fc0d35488909
由于原理在前面的两篇文章中讲解得非常详细了,今天从开发网页客户端这一层进行简单描述。
增加获取 XSRF 令牌接口
要将设备码授权许可流程做在网页端,需要预防 XSRF 攻击。这是和之前做命令行客户端时不同的一点。网页在请求设备码前,要先请求 XSRF 接口,该接口返回 200 OK,但是没有任何响应体,只是在响应头中设置一些 Cookie。后续的请求,必须带上这些 Cookie 否则拒绝服务。
测试先行
先添加一个测试,用来描述接口需求:
csharp using Microsoft.AspNetCore.Mvc.Testing; using Xunit; using Xunit.Abstractions;
namespace Host.Main.Test.IntegrationTest;
public class XsrfTest : IClassFixture<WebApplicationFactory
public XsrfTest(WebApplicationFactory<Program> factory, ITestOutputHelper testOutputHelper)
{
    _testOutputHelper = testOutputHelper;

    _client = factory.CreateClient(new WebApplicationFactoryClientOptions
    {
        AllowAutoRedirect = false,
    });
}

[Fact]
public async Task TestCanGetXsrfToken()
{
    var response = await _client.GetAsync(/api/v1/xsrf);
    response.EnsureSuccessStatusCode();
}
}
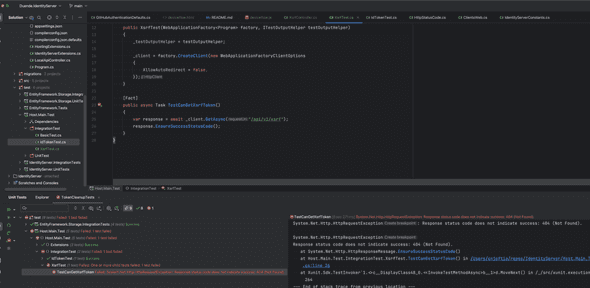
由于接口还未实现,测试结果自然是 404 。
增加接口
csharp using System; using Microsoft.AspNetCore.Antiforgery; using Microsoft.AspNetCore.Authorization; using Microsoft.AspNetCore.Http; using Microsoft.AspNetCore.Mvc;
namespace IdentityServerHost.Controllers.v1;
[Route(api/v{apiVersion:apiVersion}/[controller])] [ApiController] public class XsrfController : Controller { private readonly IAntiforgery _antiForgery;
public XsrfController(IAntiforgery antiForgery)
{
    _antiForgery = antiForgery;
}

[HttpGet]
[Route()]
public IActionResult Index()
{
    var xsrfTokenSet = _antiForgery.GetAndStoreTokens(HttpContext);
    if (string.IsNullOrWhiteSpace(xsrfTokenSet.RequestToken))
    {
        throw new InvalidOperationException(${nameof(xsrfTokenSet.RequestToken)} was null.);
    }

    Response.Cookies.Append(XSRF-TOKEN, xsrfTokenSet.RequestToken, new CookieOptions()
    {
        HttpOnly = false,
        Secure = HttpContext.Request.IsHttps,
        SameSite = SameSiteMode.Lax
    });

    return Ok();
}
}
实现以上接口后,跑了一下测试,居然是 401,出乎我的意料:
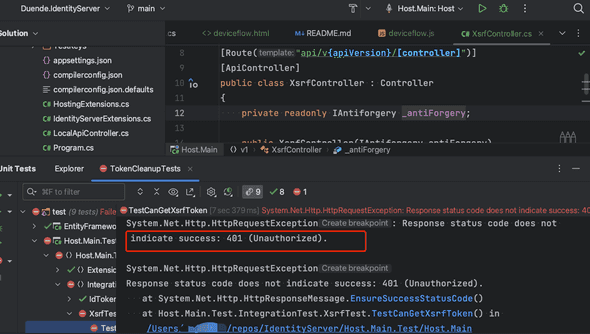
赶紧问了一下 ChatGPT,解决了:

采纳建议,测试通过!
添加网页文件和相关的 js
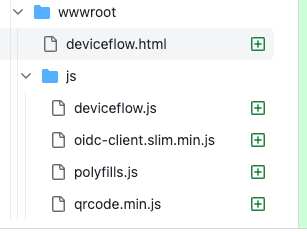
比较琐碎,就不详述了。如果你查询网页的 html 代码,看到我用了 jQuery,不要惊讶。
html
登录(Log in)
- 点击按钮(Press the button)
- 然后点击生成的链接(Click the generated link)
- 在新打开的窗口中完成登录过程(Complete the sign-in process in the newly opened window)
- 最后回到当前页面,点击“请求令牌”按钮后略做等待,你就能完成设备码登录流程啦!(Return to this page, press the Request token button and behold the glory of device flow)
Output
愉快的本地测试
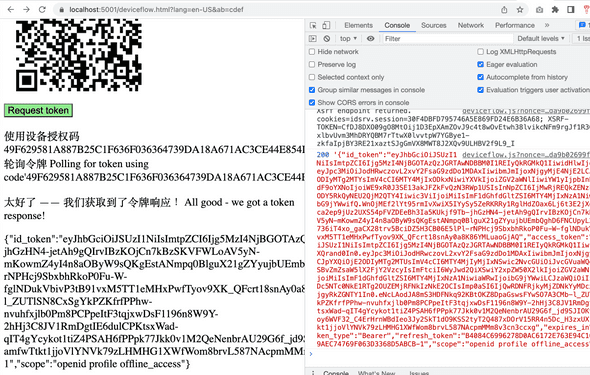
测试通过上线!
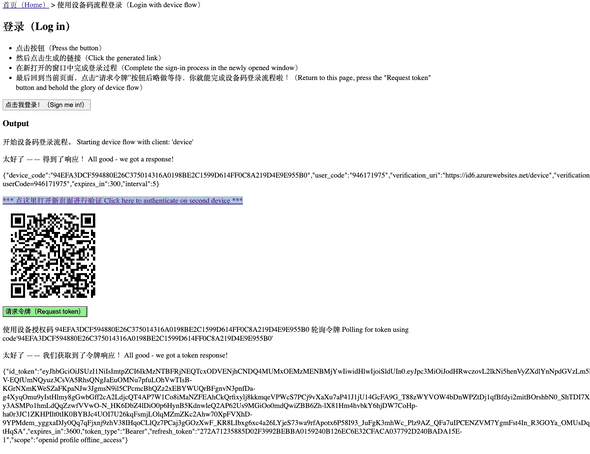
就是这么简单!如果想了解更多,还请查看《<font style=color:rgb(18, 18, 18);>OAuth 2.0:对接 Keycloak 设备码授权流程 - Jeff Tian的文章 - 知乎 》与《<font style=color:rgb(18, 18, 18);>OAuth 2.0:对接 IdentityServer 设备码授权流程 - Jeff Tian的文章 - 知乎 》。
