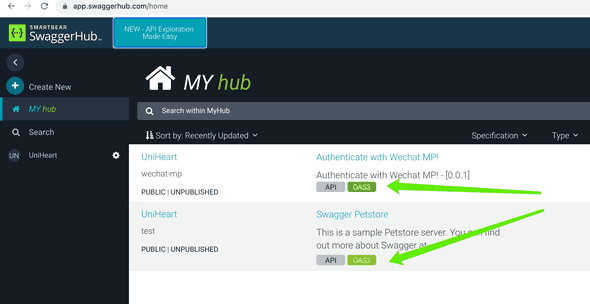
在《<font style=color:rgb(18, 18, 18);>基于 Java Spring Security 的关注微信公众号即登录的设计与实现 - Jeff Tian的文章 - 知乎 》中以一个非常具体的案例介绍了 api first 的开发方式。即先定义 api,再实现。先有 API 文档,再有代码。在定义 API 时,使用了 https://app.swaggerhub.com/,你可以选择 JSON 或者 Yaml 方式进行 API 定义,默认是 OAS 3 规范(也可以选择 OAS 2,不推荐)。
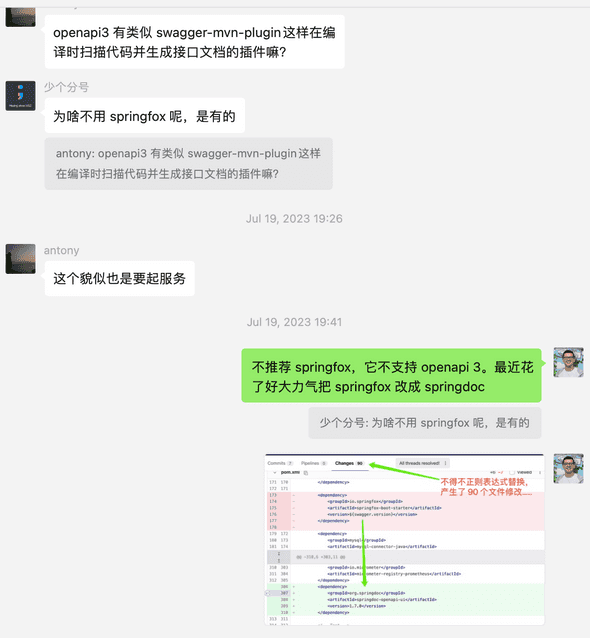
不过,也可以通过 Code First,即先写代码,再通过注解,生成 API 文档。这样的工具不少。上个月在群里有同学折腾 openapi3,有人还在建议 springfox,我正好最近抛弃了 springfox,而拥抱了 springdoc。原因是,springfox 不支持 openapi 3。在群里我简单提了一下,今天分享更多细节。
依赖替换
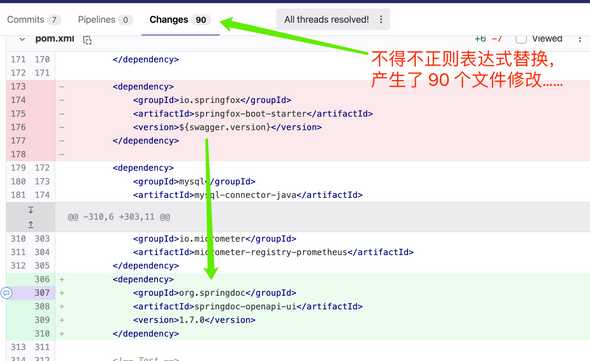
首先,显而易见的是,需要从 pom.xml 文件里删除对 springfox 的引用,并增加对 springdoc 的引用。这一步改动虽小,但引起的连锁改动非常多(对于已有项目来说):
如果项目中还使用了 knife4j 之类的 swagger 工具,还需要删除 swagger2 相关的依赖:
xml
如果想继续使用 knife4j 又想兼容 openapi 3,那么需要添加 <font style=color:rgb(23, 43, 77);>knife4j-openapi3-spring-boot-starter。由于 knife4j-openapi3-spring-boot-starter 已经包含了 springdoc-openapi-ui 的内容,如果引用了 knife4j-openapi3-spring-boot-starter,则可以不用再显式添加 springdoc-openapi-ui。
xml
后面,需要对 Controller 做一些注解增加和替换的工作,首先对引用一有些变化:
diff
- import io.swagger.annotations.Api;
- import io.swagger.v3.oas.annotations.Operation;
- import io.swagger.v3.oas.annotations.security.SecurityRequirement;
- import io.swagger.v3.oas.annotations.tags.Tag;
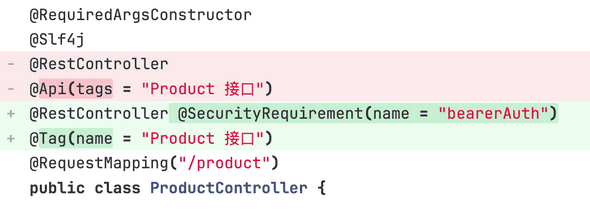
注解增加
@SecurityRequirement
注解替换
@ApiOperation==> @Operation,注意相应的 value 要替换成 summary,而 notes 要替换成 description。
当然,@Operation也支持更多属性,如:
@ApiResponse(code=404, message=foo)==> @ApiResponse(responseCode=404, description=foo)
@Api==> @Tag
@ApiIgnore==> @Parameter(hidden=true)或者 @Operation(hiddent=true)或者 @Hidden
@ApiImplicitParam==> @Parameter
@ApiImplicitParams==> @Parameters
@ApiParam==> @Parameter
@ApiModelProperty==> @Schema以及 @ApiModel==> @Schema
这是针对 Controller 中使用到的请求模型:
diff
- import io.swagger.annotations.ApiModelProperty;
- import io.swagger.v3.oas.annotations.media.Schema;
import lombok.Data;
@Data
- @ApiModel(description=xxx)
- @Schema(title=xxx)
public class CallbackVerificationRequest {
- @ApiModelProperty(value = value)
- @Schema(title=value)
private String signature;
- @ApiModelProperty(value = yyy, hidden=true)
- @Schema(title=yyy, accessMode=READ_ONLY)
private String timestamp;
- @ApiModelProperty(value = )
- @Schema()
private String nonce;
- @ApiModelProperty(value = )
- @Schema()
private String echostr;
}
注意对应的 value 属性需要改成 title。
自动修改的脚本
如果项目很大,以上替换的工作量很大。可以使用如下 python 脚本进行批量替换。
python import os import logging
logging.basicConfig(level=logging.INFO, format=%(asctime)s - %(levelname)s - %(message)s)
指定目录路径
dir_path = input(请输入要修改的目录:)
遍历目录中的所有文件
for root, dirs, files in os.walk(dir_path):
for file_name in files:
# 判断文件是否为Java源代码文件
if file_name.endswith(.java):
logging.info(replace file + file_name + ...)
# 打开文件并读取内容
with open(os.path.join(root, file_name), r) as f:
content = f.read()
# 替换特殊字符
new_content = content.replace(@ApiModelProperty(value, @Schema(title)
new_content = new_content.replace(@ApiModelProperty(, @Schema(title = )
new_content = new_content.replace(@ApiModel(value, @Tag(name)
new_content = new_content.replace(@ApiModel(, @Tag(name = )
new_content = new_content.replace(@ApiModel, @Tag(name = ))
new_content = new_content.replace(notes =, description =)
new_content = new_content.replace(required = true, requiredMode = Schema.RequiredMode.REQUIRED)
new_content = new_content.replace(required = false, requiredMode = Schema.RequiredMode.NOT_REQUIRED)
new_content = new_content.replace(@Api(value, @Tag(name)
new_content = new_content.replace(@Api(description, @Tag(name)
new_content = new_content.replace(@ApiParam(, @Parameter(description = )
new_content = new_content.replace(tags =, description =)
new_content = new_content.replace(@ApiOperation(value, @Operation(summary)
new_content = new_content.replace(@ApiOperation(, @Operation(summary = )
new_content = new_content.replace(import io.swagger.annotations.Api;, import io.swagger.v3.oas.annotations.tags.Tag;)
new_content = new_content.replace(import io.swagger.annotations.ApiOperation;, import io.swagger.v3.oas.annotations.Operation;)
new_content = new_content.replace(import io.swagger.annotations.ApiModelProperty;, import io.swagger.v3.oas.annotations.media.Schema;)
new_content = new_content.replace(import io.swagger.annotations.ApiModel;, import io.swagger.v3.oas.annotations.tags.Tag;)
# 写回文件
with open(os.path.join(root, file_name), w) as f:
f.write(new_content)
Swagger 配置修改
src/main/java/com/your/product/application/config/SwaggerConfig.java 文件主要修改如下:
diff
- import org.springframework.web.bind.annotation.RestController;
- import springfox.documentation.builders.ApiInfoBuilder;
- import springfox.documentation.builders.PathSelectors;
- import springfox.documentation.builders.RequestHandlerSelectors;
- import springfox.documentation.service.ApiInfo;
- import springfox.documentation.service.Contact;
- import springfox.documentation.service.Tag;
- import springfox.documentation.spi.DocumentationType;
- import springfox.documentation.spring.web.plugins.Docket;
-
import io.swagger.v3.oas.annotations.enums.SecuritySchemeType;
-
import io.swagger.v3.oas.annotations.security.SecurityScheme;
-
import io.swagger.v3.oas.models.OpenAPI;
-
import io.swagger.v3.oas.models.info.Info;
-
import io.swagger.v3.oas.models.security.SecurityRequirement;
-
import io.swagger.v3.oas.models.servers.Server;
-
import java.util.Arrays;
-
import java.util.List;
-
import java.util.Map;
@Configuration
- @SecurityScheme(
-
name = bearerAuth, -
type = SecuritySchemeType.HTTP, -
scheme = bearer, -
bearerFormat = JWT - )
public class SwaggerConfig {
- private List
serverList() { -
var localhost = new Server(); -
localhost.url(http://localhost:8080); -
localhost.description(Local Server); -
return List.of(localhost); - }
- private List
securityList() { -
var securityRequirement = new SecurityRequirement(); -
securityRequirement.addList(bearerAuth); -
return List.of(securityRequirement); - }
@Bean
- public Docket docket(Environment environment){
- public OpenAPI publicApi(Environment environment) { Profiles profile = Profiles.of(local, dev, ...); boolean flag = environment.acceptsProfiles(profile);
-
return new Docket(DocumentationType.SWAGGER_2) -
.enable(flag) -
.apiInfo(apiInfo()) -
.tags(new Tag(cool api, cool 相关API)) -
.select() -
.apis(RequestHandlerSelectors.withClassAnnotation(RestController.class)) -
.paths(PathSelectors.any()) -
.build();
-
return new OpenAPI() -
.servers(serverList()) -
.info(new Info() -
.title(cool api Doc) -
.extensions(Map.of( -
x-audience, external-partner, -
x-application-id, APP-12345 -
)) -
.description(cool api doc) -
.version(1.0) -
) -
.addSecurityItem(new SecurityRequirement().addList(bearer-jwt, Arrays.asList(read, write))) -
}.security(securityList());
- private ApiInfo apiInfo() {
-
return new ApiInfoBuilder() -
.title() -
.version() -
.contact(new Contact(, , )) -
.build(); - }
}
对于使用了 knife4j 的项目来说,这一步是类似的。最终的 Swagger Config 如下:
java @Configuration @Profile({local,dev,...}) public class SwaggerConfig { @Bean public OpenAPI customOpenAPI() { return new OpenAPI() .components(setToken()) .info( new Info().title(cool.api.doc) .extensions(Map.of( x-audience, external-partner, x-application-id, APP-12345 )) .description(cool API Doc) .version(1.0) ) .security(securityList()); }
/**
 * 在 swagger 页面上点击 Authorize 按钮,记录输入的 token
 */
private Components setToken() {
    return new Components().addSecuritySchemes(Authorization,
    new SecurityScheme().type(SecurityScheme.Type.HTTP).scheme(bearer).bearerFormat(JWT));
}

/**
 * 给每个请求的 header 上加一个 Authorization,值就是 setToken() 方法记录的 token,比如:Bearer eyJhbGciOiJSUxx
 */
private List<SecurityRequirement> securityList() {
    var securityRequirement = new SecurityRequirement();
    securityRequirement.addList(Authorization);
    return List.of(securityRequirement);
}
}
api 路由修改
application.yml 可以自定义 api 文档路由。
yaml springdoc: api-docs: path: v3/api-docs
注意,以上示例配置了相对路径路由,你也可以配置绝对路径路由,如 /v3/api-docs。这样可以通过访问 http://localhost:8080/v3/api-docs 拿到 openapi 的 JSON 表示。
base64 解码
如果以上路径返回的是 base64 编码后的结果,可以通过添加一个 Jackson 配置来解码:
java @Configuration public class JacksonConfig implements WebMvcConfigurer {
@Autowired(required = false)
private List<MyBeanSerializerModifier> myBeanSerializerModifierList;

@Override
public void extendMessageConverters(List<HttpMessageConverter<?>> converters) {
    MappingJackson2HttpMessageConverter jackson2HttpMessageConverter = new MappingJackson2HttpMessageConverter();

    ObjectMapper objectMapper = jackson2HttpMessageConverter.getObjectMapper();
    ......
    objectMapper.registerModule(simpleModule).registerModule(javaTimeModule).registerModule(new ParameterNamesModule());

    SerializerFactory serializerFactory = objectMapper.getSerializerFactory();
    if (CollectionUtils.isNotEmpty(myBeanSerializerModifierList)) {
        for (MyBeanSerializerModifier myBeanSerializerModifier : myBeanSerializerModifierList) {
            serializerFactory = serializerFactory.withSerializerModifier(myBeanSerializerModifier);
        }
    }
    objectMapper.setSerializerFactory(serializerFactory);

    jackson2HttpMessageConverter.setObjectMapper(objectMapper);

    //放到第二个,保证 ByteArrayHttpMessageConverter 放在第一位
    converters.add(1, jackson2HttpMessageConverter);
}
}
运行验证
shell mvn clean compile mvn spring-boot:run -f pom.xml open http://localhost:8080/swagger-ui.html
CICD 支持
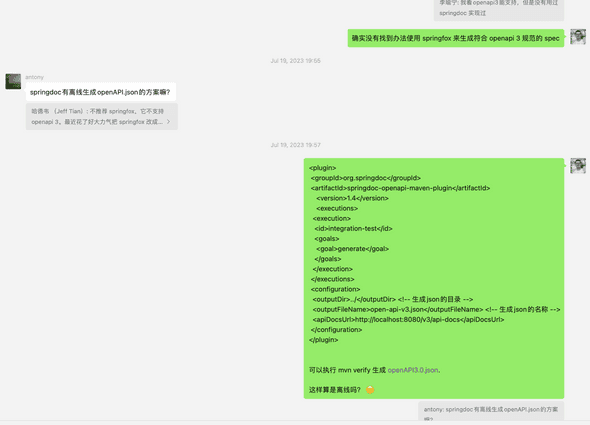
如果希望在 CICD 过程中自动将最新的 open api 上传到 Swagger Hub 之类的中央存储,可以在 SpringBootApplication.java 所在模块下的 pom.xml 中配置一些 maven plugins 使得在 mvn verify时自动将下载 open-api.json 文件。
<font style=color:rgb(23, 43, 77);>springdoc-openapi-maven-plugin
xml
<font style=color:rgb(23, 43, 77);background-color:rgb(244, 245, 247);>springdoc-openapi-maven-plugin
xml

