:::color4 警告:
单点登录系统是整个数字化安全生态中至关重要的一环,一般建议使用成熟的解决方案。自己实现的话,不仅开发成本高,而且安全性没有保障。
常见的 SSO 协议有 OAuth 2、OpenID Connect 和 SAML,常用的 SSO 提供商有 Okta、Keycloak、Auth0、以及中国的 authing.cn 等。
:::
由于安全涉及到的方面非常繁多,哪怕一个细节有隐患,都会成为黑客攻击的突破口。因此,非常不建议自己实现单点登录系统。但是,对于学习来说,却正好相反,需要剥离各种细节,从相对简单的模型开始,循序渐进。
我们今天使用 Python 来搭建一个最简单的固定用户名密码的中心用户认证系统,然后以 Java SpringBoot 举例,介绍下游客户端应用如何接入这样的中心用户认证系统,实现单点登录。
基于 Python Flask 的用户认证系统
代码详见: Jeff-Tian/sso (github.com) ,核心代码是:
python import jwt import datetime from flask import Flask, request, redirect, url_for, session, render_template
Initialize the Flask application
app = Flask(name)
Secret key for session management
app.secret_key = 0a86d121-f01f-4524-a922-c86138e4f88a
Secret key for JWT encoding/decoding
JWT_SECRET = your_jwt_secret
Dummy user data for authentication
users = {user1: password1}
@app.route(/) def home(): # Retrieve the token from the session token = session.get(token) if token: try: # Decode the JWT token payload = jwt.decode(token, JWT_SECRET, algorithms=[HS256]) # Render the home page with the users information return render_template(SSO-home.html, user=payload[user]) except jwt.ExpiredSignatureError: # Redirect to login if the token has expired return redirect(url_for(login)) except jwt.InvalidTokenError: # Redirect to login if the token is invalid return redirect(url_for(login))
# Render the home page without user information if no token is found
return render_template(SSO-home.html)
@app.route(/login, methods=[POST, GET]) def login(): if request.method == POST: # Get username and password from the form username = request.form[username] password = request.form[password] # Check if the username and password match if username in users and users[username] == password: # Create a JWT token with user information and expiration time token = jwt.encode({ user: username, exp: datetime.datetime.utcnow() + datetime.timedelta(hours=1) }, JWT_SECRET, algorithm=HS256) # Store the token in the session session[token] = token # Redirect to the next page or home page next_url = request.args.get(next) or url_for(home) return redirect(f{next_url}?token={token})
# Render the login page
return render_template(login.html)
@app.route(/logout) def logout(): # Remove the token from the session session.pop(token, None) # Redirect to the home page return redirect(url_for(home))
if name == main: # Run the Flask application on port 5000 app.run(port=5000)
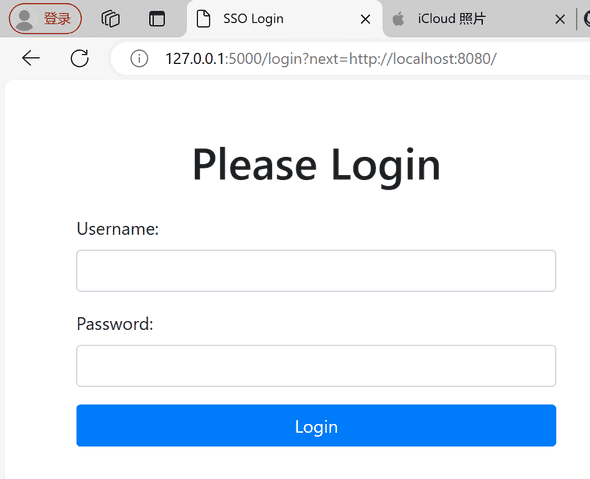
注意其中的 login 方法,当登录成功之后,会为用户颁发一个 JWT 令牌,并且将该令牌以查询字符串的形式传递回发起的客户端应用。
基于 SpringBoot 的应用接入该身份认证中心
完整代码见:Jeff-Tian/ssoclient (github.com)。
增加两个依赖
因为我们用 Python 实现的极简单点登录系统是基于 JWT 的,所以需要引用 jjwt。另外,SpringBoot Security 不可少,后面会用到很多 Security 中的机制来对系统进行保护。
xml
SecurityConfig 配置
增加一个配置项,以在 Spring Security 中,添加对 JWT 的支持,代码如下:
java import org.springframework.context.annotation.Bean; import org.springframework.security.config.annotation.web.builders.HttpSecurity; import org.springframework.security.config.annotation.web.configuration.EnableWebSecurity; import org.springframework.security.config.annotation.web.configuration.WebSecurityConfigurerAdapter; import org.springframework.security.web.authentication.UsernamePasswordAuthenticationFilter;
import com.warrenluo.ssoclient.demos.web.filter.JwtAuthenticationFilter;
@EnableWebSecurity public class SecurityConfig extends WebSecurityConfigurerAdapter { @Override protected void configure(HttpSecurity http) throws Exception { http.authorizeRequests() .antMatchers(/).permitAll() .antMatchers(/login).permitAll() .anyRequest().authenticated() .and() .addFilterBefore(jwtAuthenticationFilter(), UsernamePasswordAuthenticationFilter.class); }
@Bean
public JwtAuthenticationFilter jwtAuthenticationFilter() {
    return new JwtAuthenticationFilter();
}
}
以上配置对根路由和 /login 路由开放,允许所以人访问,而对其他路由,都要求登录后才能访问。并且添加了一个 JWT 验证的过滤器。
过滤器
<font style=color:rgb(31, 31, 33);background-color:rgb(249, 249, 251);>创建一个过滤器类 <font style=color:rgb(31, 31, 33);background-color:rgb(249, 249, 251);>JwtAuthenticationFilter<font style=color:rgb(31, 31, 33);background-color:rgb(249, 249, 251);>,用于解析和验证 JWT:
java
import java.io.IOException; import java.util.ArrayList;
import javax.servlet.FilterChain; import javax.servlet.ServletException; import javax.servlet.http.Cookie; import javax.servlet.http.HttpServletRequest; import javax.servlet.http.HttpServletResponse;
import org.springframework.security.authentication.UsernamePasswordAuthenticationToken; import org.springframework.security.core.context.SecurityContextHolder; import org.springframework.security.core.userdetails.UserDetails; import org.springframework.security.web.authentication.WebAuthenticationDetailsSource; import org.springframework.util.StringUtils; import org.springframework.web.filter.OncePerRequestFilter;
import io.jsonwebtoken.Claims; import io.jsonwebtoken.Jwts;
public class JwtAuthenticationFilter extends OncePerRequestFilter { // 与 SSO 系统中的密钥保持一致 private final String JWT_SECRET = your_jwt_secret;
@Override
protected void doFilterInternal(HttpServletRequest request, HttpServletResponse response, FilterChain filterChain)
        throws ServletException, IOException {
    // 从请求头中获取 JWT Token
    String token = getTokenFromRequest(request);

    if (token != null) {
        logger.info(Token:  + token);
        try {
            Claims claims = Jwts.parser()
                    .setSigningKey(JWT_SECRET.getBytes())
                    .parseClaimsJws(token)
                    .getBody();

            String username = claims.get(user, String.class);

            logger.info(User  + username +  is authenticated);

            if (username != null && SecurityContextHolder.getContext().getAuthentication() == null) {
                UserDetails userDetails = new org.springframework.security.core.userdetails.User(username, ,
                        new ArrayList<>());

                UsernamePasswordAuthenticationToken authentication = new UsernamePasswordAuthenticationToken(
                        userDetails, null, userDetails.getAuthorities());

                authentication.setDetails(new WebAuthenticationDetailsSource().buildDetails(request));

                SecurityContextHolder.getContext().setAuthentication(authentication);
            }
        } catch (Exception e) {
            logger.error(Fail to set user authentication, e);
        }
    } else {
        logger.info(No token found);
    }

    filterChain.doFilter(request, response);
}

private String getTokenFromRequest(HttpServletRequest request) {
    String bearerToken = request.getHeader(Authorization);
    if (StringUtils.hasText(bearerToken) && bearerToken.startsWith(Bearer )) {
        return bearerToken.substring(7);
    } else if (request.getCookies() != null) {
        for (Cookie cookie : request.getCookies()) {
            if (cookie.getName().equals(token)) {
                return cookie.getValue();
            }
        }
    } else {
        Object token = request.getSession().getAttribute(token);

        if (token != null) {
            return token.toString();
        }
    }

    return null;
}
}
需要注意的是 getTokenFromRequest方法,会尝试先从 Header 中获取令牌,如果没有获取到,就会从 Cookie 最后从 Session 中获取 Token。
Auth Controller
在这里我们来配置登录和注销。<font style=color:rgb(31, 31, 33);background-color:rgb(249, 249, 251);>由于我们的 SSO 系统在 <font style=color:rgb(31, 31, 33);background-color:rgb(249, 249, 251);>/login<font style=color:rgb(31, 31, 33);background-color:rgb(249, 249, 251);> 和 <font style=color:rgb(31, 31, 33);background-color:rgb(249, 249, 251);>/logout<font style=color:rgb(31, 31, 33);background-color:rgb(249, 249, 251);> 路径上处理登录和注销,所以相应地我们需要在 Spring Boot 项目中配置这些路径的重定向:
java
import javax.servlet.http.Cookie; import javax.servlet.http.HttpServletResponse; import javax.servlet.http.HttpSession;
import org.springframework.stereotype.Controller; import org.springframework.web.bind.annotation.GetMapping; import org.springframework.web.bind.annotation.RequestParam;
@Controller public class AuthController { @GetMapping(/login) public String login(@RequestParam(required = false) String token, HttpServletResponse response, HttpSession session) { if (token != null) { // 如果从 SSO 系统中获取到了 token,将其存储在 Cookie 或 Session 中 Cookie cookie = new Cookie(token, token); cookie.setHttpOnly(true); cookie.setPath(/); cookie.setMaxAge(3600); response.addCookie(cookie);
        session.setAttribute(token, token);

        return redirect:/user;
    }

    return redirect:http://127.0.0.1:5000/login?next=http://localhost:8080/login;
}

@GetMapping(/logout)
public String logout(HttpServletResponse response, HttpSession session) {
    Cookie cookie = new Cookie(token, null);
    cookie.setHttpOnly(true);
    cookie.setPath(/);
    cookie.setMaxAge(0);
    response.addCookie(cookie);

    session.removeAttribute(token);
    // 以下这行很重要,否则不能正常退出。
    session.invalidate();

    return redirect:/;
}
}
注意登录方法,也是先设置 Cookie,再设置 Session,接着才跳转到登录前的页面。拿出方法相应地移除 Cookie 和 Session,然后跳转到首页。其中退出登录时,一定要调用 session.invalidate();,否则会不能正常退出登录。
测试集成
先启动 SSO,再启动 java sso client。通过 http://localhost:8080/login 登录,通过 http://localhost:8080/logout 登出。
优化
未登录时自动跳转到 SSO 系统
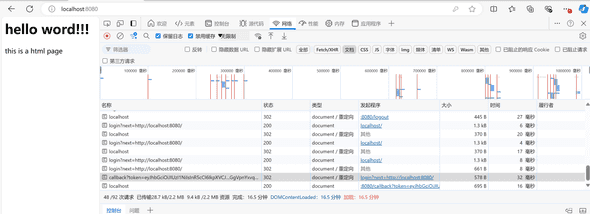
希望在未登录时,自动跳转到身份认证中心。为了在未登录时自动重定向到 SSO 登录页面,我们可以自定义一个未认证处理器,这个处理器将在用户尝试访问受保护资源但未认证时触发。我们可以通过扩展 AuthenticationEntryPoint 来实现这一点。详见这个提交: feat: 未登录时自动跳转 · Jeff-Tian/ssoclient@a4b7ba4 · GitHub
增加依赖
再在 pom.xml 里增加一个新的依赖:
xml
增加一个 Authentication Filter
java
import java.io.IOException;
import javax.servlet.ServletException; import javax.servlet.http.HttpServletRequest; import javax.servlet.http.HttpServletResponse;
import org.springframework.security.core.AuthenticationException; import org.springframework.security.web.AuthenticationEntryPoint; import org.springframework.stereotype.Component;
@Component public class CustomAuthenticationEntryPoint implements AuthenticationEntryPoint {
@Override
public void commence(HttpServletRequest request, HttpServletResponse response,
        AuthenticationException authException) throws IOException, ServletException {

    // 重定向到 SSO 登录页面,并带上当前 URL 作为 next 参数
    String redirectUrl = http://127.0.0.1:5000/login?next= + request.getRequestURL();
    response.sendRedirect(redirectUrl);
}
}
修改安全配置
在 Spring Security 配置类中,配置自定义的 AuthenticationEntryPoint:
java
import com.warrenluo.ssoclient.demos.web.CustomAuthenticationEntryPoint; import com.warrenluo.ssoclient.demos.web.filter.JwtAuthenticationFilter;
@EnableWebSecurity public class SecurityConfig extends WebSecurityConfigurerAdapter {
@Autowired
private CustomAuthenticationEntryPoint customAuthenticationEntryPoint;

@Override
protected void configure(HttpSecurity http) throws Exception {
    http.authorizeRequests()
            .antMatchers(/).permitAll()
            .antMatchers(/login).permitAll()
            .anyRequest().authenticated()
            .and()
            .exceptionHandling()
            // 使用自定义的 AuthenticationEntryPoint
            .authenticationEntryPoint(customAuthenticationEntryPoint)
            .and()
            .addFilterBefore(jwtAuthenticationFilter(), UsernamePasswordAuthenticationFilter.class);
}
// ...
}
这样就达到了效果!
统一处理登录回调
现在可以自动跳转了,但还有一个问题。我们前面的实现,只在 /login 里处理登录成功后设置 Cookie 和 Session 的逻辑。现在一旦跳转回来不是这个路由,系统仍然会再次跳转到 SSO 系统。
为了确保在 SSO 登录成功后能够正确设置 JWT 并重定向到用户请求的原始页面,我们需要确保 SSO 回调到一个可以处理 JWT 并设置 Cookie 和 Session 的页面。我们可以将所有回调都统一处理到一个专门的回调处理器上。

修改 SSO 系统中的登录回调
确保 SSO 系统在登录成功后始终回调到一个统一的处理页面,例如 /callback,并在回调 URL 中包含 JWT。
因为修改 Python SSO 系统中的登录代码,由于发起登录的客户端不只一个,所以在 SSO redirect 时不能写死 localhost:8080,要从 next_url 分析出 host。
为了处理来自多个客户端的登录请求,并确保在 SSO 登录成功后正确回调到发起请求的客户端,你可以在 SSO 系统中动态生成回调 URL,并从 next_url 中提取主机信息。从 next_url 中提取主机信息,并动态生成回调 URL。
修改 login 路由:
python
@app.route(/login, methods=[POST, GET]) def login(): if request.method == POST: # Get username and password from the form username = request.form[username] password = request.form[password] # Check if the username and password match if username in users and users[username] == password: # Create a JWT token with user information and expiration time token = jwt.encode({ user: username, exp: datetime.datetime.utcnow() + datetime.timedelta(hours=1) }, JWT_SECRET, algorithm=HS256) # Store the token in the session session[token] = token
        next_url = request.args.get(next) or url_for(home)

        # 从 next_url 中提取主机信息
        parsed_url = urlparse(next_url)
        host = f{parsed_url.scheme}://{parsed_url.netloc}

        # 动态生成回调 URL
        callback_url = f{host}/callback
        query_params = urlencode({token: token, next: next_url})

        # 回调到统一的处理页面
        return redirect(f{callback_url}?{query_params})

# Render the login page
return render_template(login.html)
在 Java 客户端应用中创建一个统一的回调处理器
这就是把原先 login 中的逻辑移动到了这里,这样不仅工作得更好,从代码质量上看,也更加职责单一了。
java import javax.servlet.http.Cookie; import javax.servlet.http.HttpServletResponse; import javax.servlet.http.HttpSession;
import org.springframework.stereotype.Controller; import org.springframework.web.bind.annotation.GetMapping; import org.springframework.web.bind.annotation.RequestParam;
@Controller public class CallbackController { @GetMapping(callback) public String callback(@RequestParam String token, @RequestParam String next, HttpServletResponse response, HttpSession session) { // 设置 JWT 到 Cookie 和 Session Cookie cookie = new Cookie(token, token); cookie.setHttpOnly(true); cookie.setPath(/); cookie.setMaxAge(3600); // 1 hour response.addCookie(cookie);
    session.setAttribute(token, token);

    // 重定向到用户请求的原始页面
    return redirect: + next;
}
}
 放通 callback 的访问
由于 callback 是用来处理用户登录的,也就是在未登录情况下,将页面访问设置成登录状态。所以必须放通允许未登录的访问,否则系统就不能正常进行登录态了,从而卡死在未登录情况下,不停地往认证中心跳转。
java
@Override
protected void configure(HttpSecurity http) throws Exception {
    http.authorizeRequests()
            .antMatchers(/login, /callback).permitAll()
            .anyRequest().authenticated()
            .and()
            .exceptionHandling()
            // 使用自定义的 AuthenticationEntryPoint
            .authenticationEntryPoint(customAuthenticationEntryPoint)
            .and()
            .addFilterBefore(jwtAuthenticationFilter(), UsernamePasswordAuthenticationFilter.class);
}
删除 /login 中原有的登录处理逻辑
这一步是可选的,即使不删除,系统也能正常工作了。由于在未登录时,现在系统已经能够自动跳转到论证中心,因此直接删除所有的 /login 代码和这个接口都是可以的,不再详述。

